I like to think of infrastructure as the part of a system that everyone needs and no one likes to work on! It is often undifferentiated & messy, tedious to work on, difficult to manage, critical to the success of whatever relies on it, and generally taken for granted (as long as it works as expected).
Many of our customers host backend web services for their mobile, web, enterprise, or IoT (Internet of Things) applications on AWS. These services have no user interface. Instead, they are accessed programmatically, typically using a REST-style interface. In order to successfully host an application backend you need to think about the infrastructure: authorization, access control, traffic management, monitoring, analytics, and version management. None of these tasks are easy, and all count as infrastructure. In many cases you also need to build, maintain, and distribute SDKs (Software Development Kits) for one or more programming languages. Put it all together, and the amount of code and resources (not to mention head-scratching) devoted to the infrastructure for web services can dwarf the actual implementation of the service. Many of our customers have told us that they would like to make investments in web services, but have little interest in building or maintaining the infrastructure for them due to the cost and complexity involved.
New API Gateway
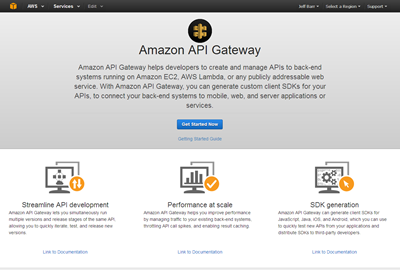 Today we are introducing the new Amazon API Gateway. This new pay-as-you-go service allows you to quickly and easily build and run application backends that are robust, and scalable. Instead of worrying about the infrastructure, you can focus on your services.
The API Gateway makes it easy for you to connect all types of applications to API implementations that run on AWS Lambda, Amazon Elastic Compute Cloud (EC2), or a publicly addressable service hosted outside of AWS. If you use Lambda (I’ll show you how in just a moment), you can implement highly scalable APIs that are totally server-less.
You can also implement APIs that wrap around, enhance, and effectively modernize legacy systems. You can aggregate the results from multiple old-school RPC-style web services calls into a single response, filter and process the data, and even protect the backend service from overload by taking advantage of the built-in throttling feature.
The API Gateway was designed to deliver on the following promises:
- Scalable & Efficient – Handle any number of requests per second (RPS) while making good use of system resources.
- Self-Service & Highly Usable – Allow you to define, revise, deploy, and monitor APIs with a couple of clicks, without requiring specialized knowledge or skills, including easy SDK generation.
- Reliable – Allow you to build services that are exceptionally dependable, with full control over error handling, including customized error responses.
- Secure – Allow you to take advantage of the latest AWS authorization mechanisms and IAM policies to manage your APIs and your AWS resources.
- Performant – Allow you to build services that are globally accessible (via CloudFront) for low latency access, with data transfer to the backend over the AWS network.
- Cost-Effective – Allow you to build services that are economical to run, with no fixed costs and pay-as-you-go pricing.
 We spent a lot of time focusing on the needs of developers as we designed this service. For example, many of our customers told us that they use Swagger to describe their APIs. They can import their existing definitions into the API Gateway in minutes using a tool that we supply, and connect them to new or existing implementations just as quickly.
We also support an API-first development model so that definitions can be created while the implementation is still underway. Once the APIs have been defined, the API Gateway can create JavaScript, iOS, and Android SDKs with a couple of clicks (we’ll add even more languages in the future).
 There are also plenty of features designed to simplify testing and deployment. You can test your APIs from within the AWS Management Console, with full access to the HTTP status code, the response (body and headers), and the request log.
You can create multiple environments (which the gateway calls stages) of a given API and then selectively deploy them within the scope of a tag that you define (think dev, beta, prod, and so forth), again with a couple of clicks. Each operation in each version can (but need not) have a distinct implementation. When the time comes to create a new version of an API, you can clone an existing one, deploy the clone to a distinct stage, and continue to work on both, with the eventual goal of deprecating the older one. You can also use custom domain names to exercise more control over the URL of each service.
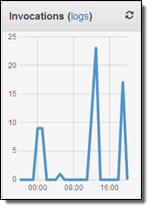 Finally, the API Gateway provides plenty of operational support!
After you deploy your API, the Gateway will expeditiously accept, handle, monitor, and respond to requests. You can configure a cache on a per-stage basis, with full control over the lifetime of cached responses and the mapping of request parameters to cache keys. Requests to your APIs are logged to Amazon CloudWatch and detailed metrics are reported to Amazon CloudWatch on a per-stage, per-method basis. Administrative actions such as creating and configuring APIs are logged to CloudTrail for auditing. You can throttle requests if they exceed a desired rate, and you can use AWS Identity and Access Management (IAM), Amazon Cognito, or OAuth credentials to authorize access to individual methods.
API Gateway in Action
Let’s walk through the process of creating an API in front of a couple of Lambda functions. Due to space constraints, I’m going to show off just a few of the Gateway’s features and I’m going to skip a couple of steps related to IAM policies. I would encourage you to read the Amazon API Gateway Developer Guide to learn more about what the service can do and to learn how to create the necessary policies.
I’ll start by opening up the API Gateway Console and creating an API:
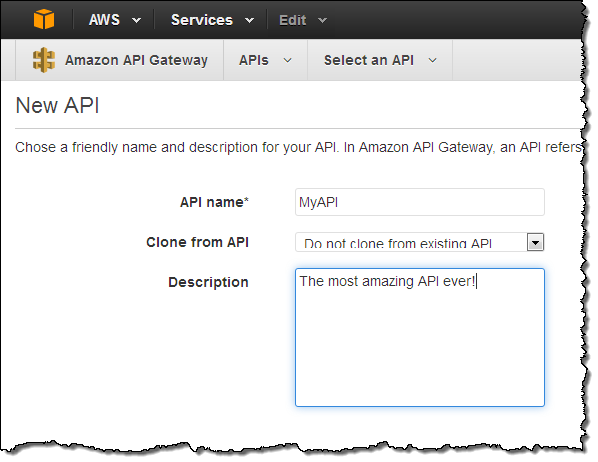
The console shows my API in tree fashion:
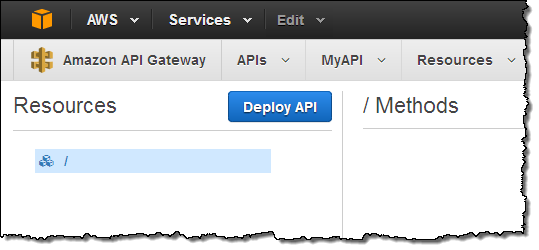
Then I create a child resource within the root resource by clicking on the Create Resource button:
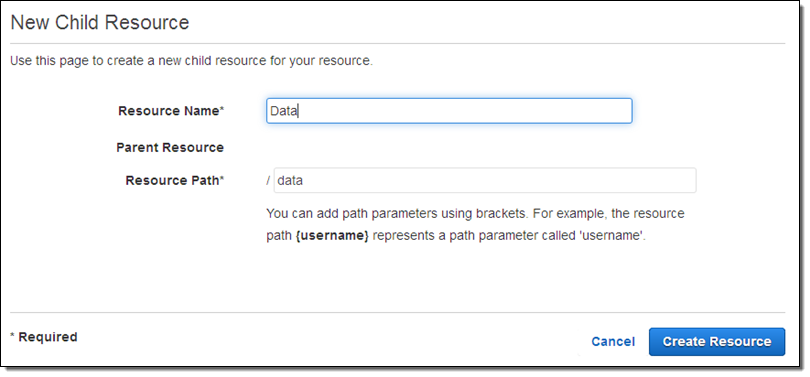
The new resource is created and shown in the tree:
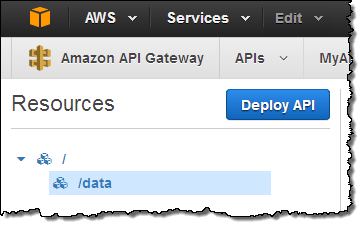
Now I need some actual code. I switch over to the Lambda Console and create a pair of functions that will serve as implementations of methods on the /data resource. The first function is called GetHelloWorld. It takes no inputs and returns a very simple constant JSON object. Here’s the code:
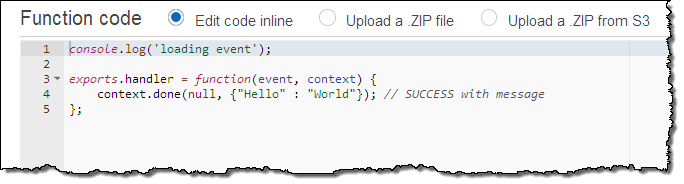
The second function is called GetHelloWithName. This one is slightly more sophisticated. If it is supplied with a parameter called name, it will return that name in the JSON object. If the parameter is not present it will use the string “No-Name” instead. Here’s the code:
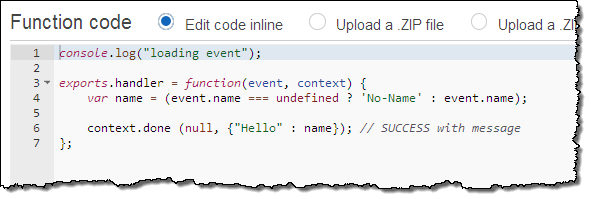
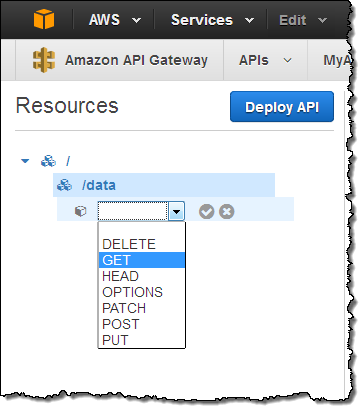
With the two functions ready, I can now create the methods on the resource and attach them to the code. I return to the API Gateway Console, click on Create Method, and choose an HTTP method:
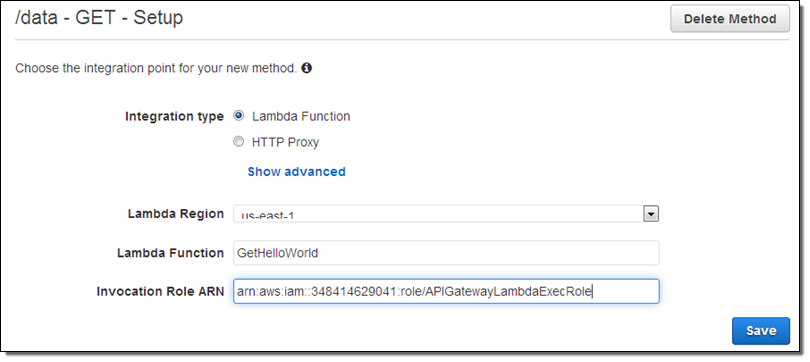
I can create multiple methods (one per HTTP verb) on any of my resources. I’ll choose GET, and then designate a Lambda function as my Integration Type (we’ll talk about the other ones later on):
Now I have the option to customize each phase of the call to the API (method request & response, integration request & response):
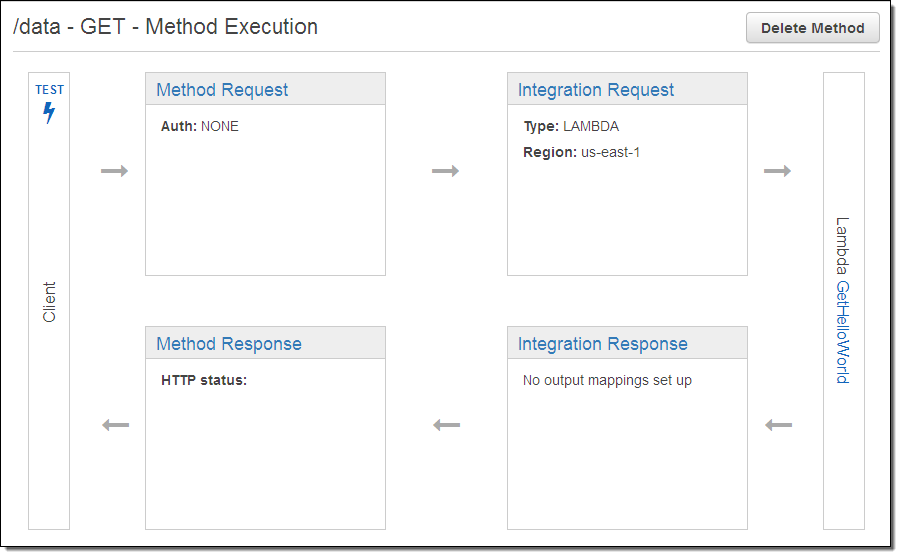
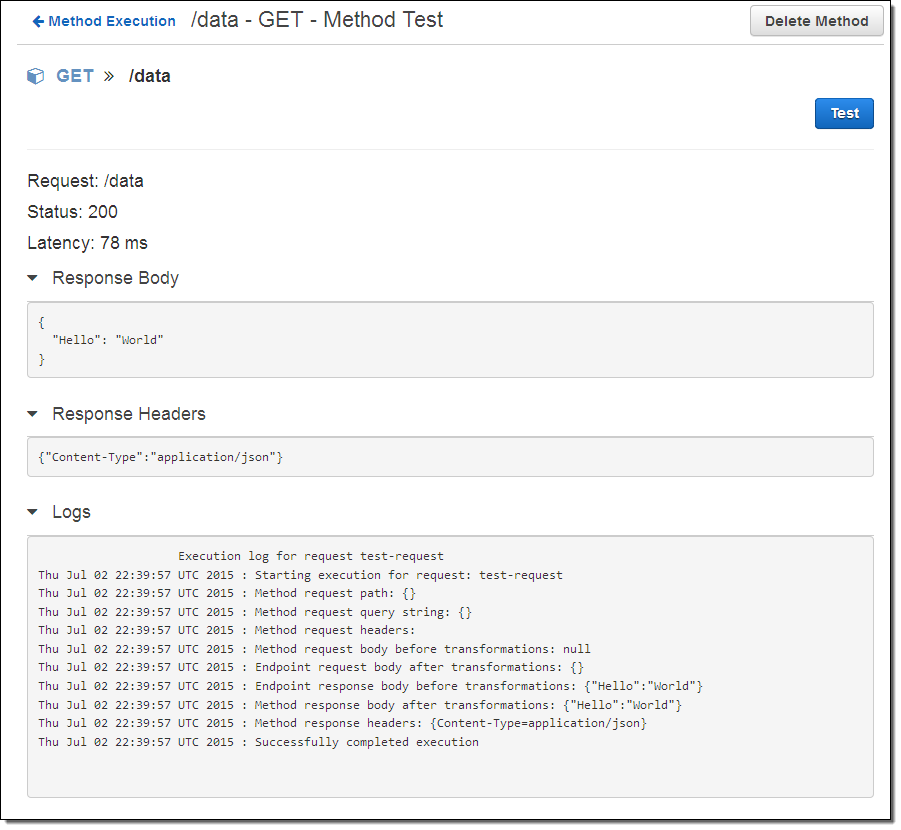
The default settings will work just fine for me! It is time to see my method in action, so I click on the TEST icon (the lightning bolt) and then click the Test button. The API Gateway calls my method and provides me with access to the response body, response headers, and an execution log (the work that was done to prepare for, issue, and process the call to my Lambda function):
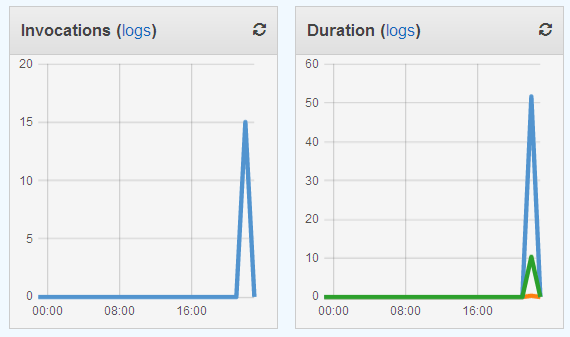
I can also hop on over to the Lambda Console and see the metrics for my function from there:
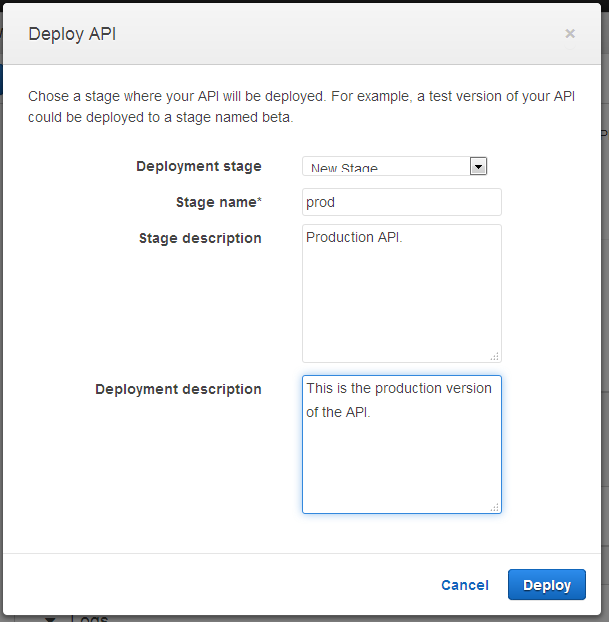
Once I am happy with my API I can deploy it so that others can make use of it. To do this I simply click on the Deploy API button, and then choose a stage. The stage becomes part of the API’s URL; it allows me to have multiple, parallel deployments (staging, beta, production, and so forth) that are isolated and independent of each other. Here’s how I create a stage called prod (for production):
Then I have the opportunity to set some options for the stage. I can opt to log API calls to CloudWatch Logs and to send per-metric metrics to CloudWatch. I can also indicate that every call to the API must include an API key in order for it to be accepted:
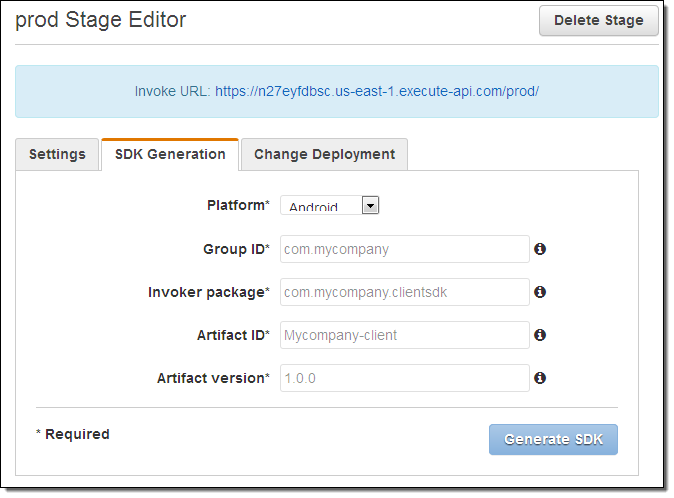
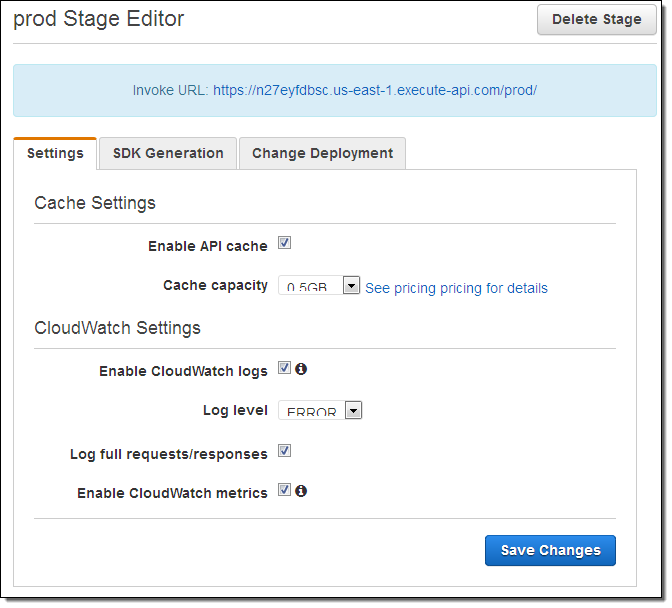 As you can see, the Console displays the invocation URL for the API. It also gives me the option to generate an SDK for it:
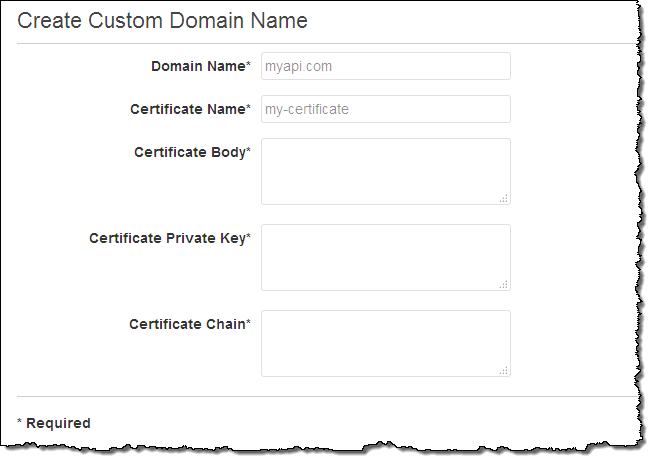
I can also create a custom domain name and expose the resulting URL as the preferred invocation URL for my service (all of this can be done via the Console, and is implemented via CloudFront):
At this point I have created and deployed a fully scalable API without having to think about the infrastructure. If my Hello World function became incredibly popular, I would need to do nothing more than to make sure that my AWS account was configured to handle the appropriate number of concurrent Lambda requests.
Enhancing Legacy Services
You (or your organization) probably has some existing web services that respond to older protocols such as XML-RPC or SOAP. You can use the API Gateway to modernize these services by taking advantage of the following features, picking and choosing as needed to suit your needs:
- Traffic Management – You can configure the API Gateway to throttle requests if they exceed a predefined limit. This will allow you to avoid overloading existing (and possibly non-scalable) backend systems.
- Authorization – You can enable the latest AWS-style (AWS Signature v4) authentication for the APIs that you create (check out Signing API Requests) for more information on AWS authentication. The SDKs that you generate through the API Gateway will take care of all of the necessary signing, encryption, and decryption.
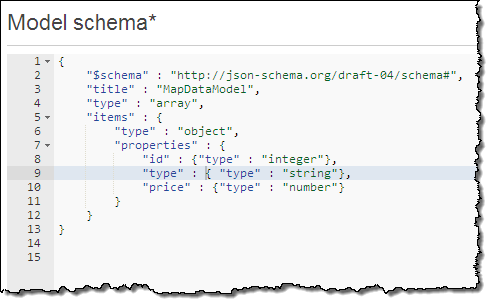
- Data Transformation – If your existing services return XML-style data, you can use the API Gateway to transform the output to JSON as part of your modernization effort. One of our early customer is in the process of moving their service implementation to a Lambda-based model, with functions that return JSON data. During the transition period they are using the API Gateway to transform the output of legacy services to JSON, allowing them to make a move that is seamless and non-disruptive. The transformation is specified using JSON-Schema, like this:
- REST-to-RPC and Back – You can create new API endpoints that respond to GET requests, and map them to existing endpoints that are accessed using a POST. Along the way you can use the API Gateway to transform the GET parameters into the request body for the POST.
Wait, There’s More!
Let’s take a look at a couple more API Gateway features before we wrap up.
The connection between my resource definition (the resource name and the HTTP method) and some code is called an Integration Request. As you have already seen, the request can be routed to a Lambda function with a couple of clicks. It can also be routed to an arbitrary HTTP endpoint (running on EC2 or at any public accessible location). Along the way, the request can be mapped to a different HTTP method (changing a GET to a POST, for example) and an API Gateway Model can be used to transform the input into the form required by the service running at the endpoint. Models are specified using JSON-Schema and can be set up using the Console.
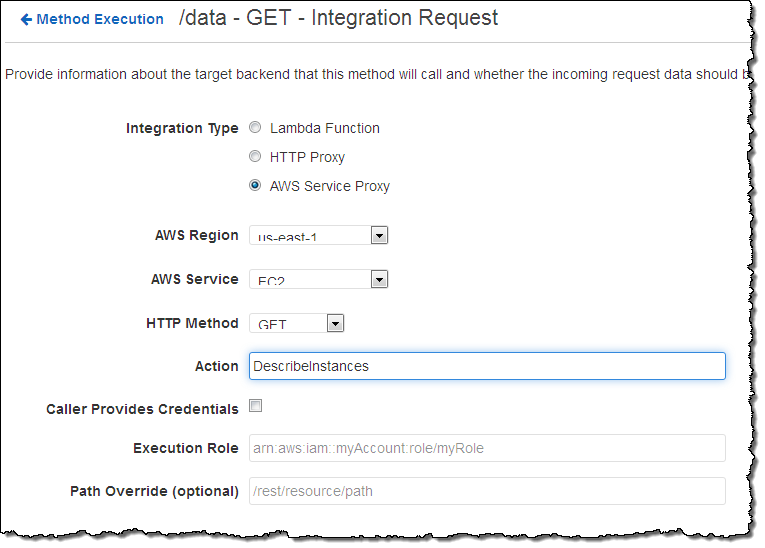
I can use an API function provided by an AWS service as an endpoint. This option makes use of the AWS Service Proxy included within the API Gateway. Here’s how I would set that up:
I mentioned API keys earlier. If you want to allow third parties (customers, developers, or integration partners) to access your API on a controlled basis, you can create API keys and mandate that they be used to call your API. This function is designed for metering usage; you should use one of the AWS authentication options (or OAuth) to control access to your APIs.
Available Now
The Amazon API Gateway is available today in the US East (Northern Virginia), US West (Oregon), and Europe (Ireland) regions and you can start using it today.
The pricing model is simple. You pay for calls to the API and for outbound data transfer (the information returned by your APIs). Caching is priced separately, and the price is depending on the size of the cache that you configure.
— Jeff;

 AWS customers are deploying Amazon WorkSpaces at scale in medium and large organizations. For example, health care company Johnson & Johnson is using WorkSpaces to realize the long-promised security and efficacy benefits of virtual desktops, in a world populated by a diverse workforce that would like to use their own computing devices if possible (also known as BYOD – Bring Your Own Device). You can view their recent presentation, Deploying Amazon WorkSpaces at Scale, to learn more about what they did and how they now support BYOD for 16,000 contractors and employees, along with zero clients for another 8,000 users.