Many AWS customers run some of their mission-critical applications on a periodic (daily, weekly, or monthly), part-time basis. Here are some of the kinds of things that they like to do:
- A bank or mutual fund performs Value at Risk calculations every weekday afternoon.
- A phone company does a multi-day bill calculation run at the start of each month.
- A trucking company optimizes routes and shipments on Monday, Wednesday, and Friday mornings.
- An animation studio performs a detailed, compute-intensive 3D rendering every night.
Our new Scheduled Reserved Instances are a great fit for use cases of this type (and many more). They allow you to reserve capacity on a recurring basis with a daily, weekly, or monthly schedule over the course of a one-year term. After you complete your purchase, the instances are available to launch during the time windows that you specified.
Purchasing Scheduled Instances
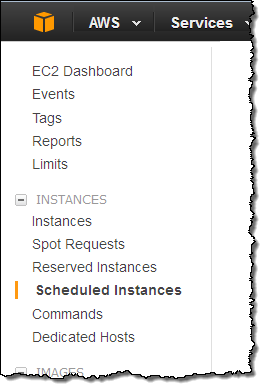
Let’s step through the purchase process using the EC2 Console. I start by selecting Scheduled Instances on the left:
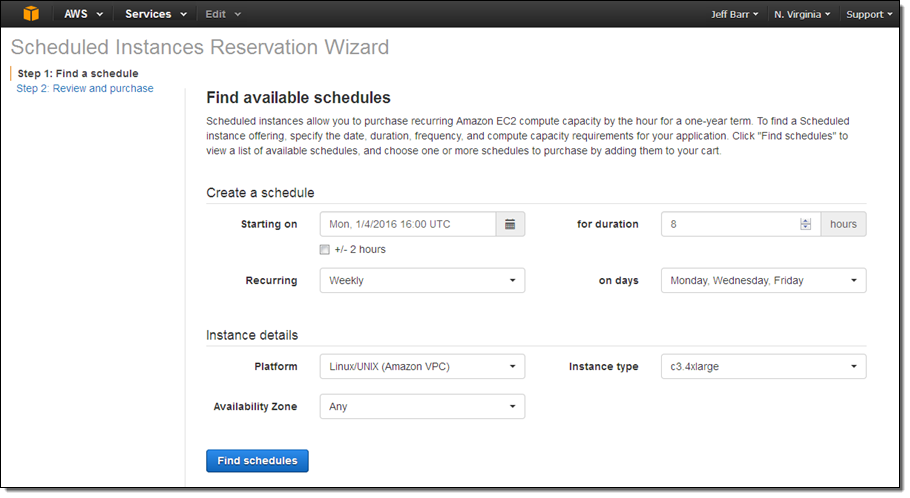
Then I click on the Purchase Scheduled Instances button and find a schedule that suits my needs.
Let’s say that I am based in Seattle and want to set up a schedule for Monday, Wednesday, and Friday mornings. I convert my time (6 AM) to UTC, choose my duration (8 hours of processing for my particular use case), and set my recurrence. Then I specify a c3.4xlarge instance (I can select one or more types using the menu):
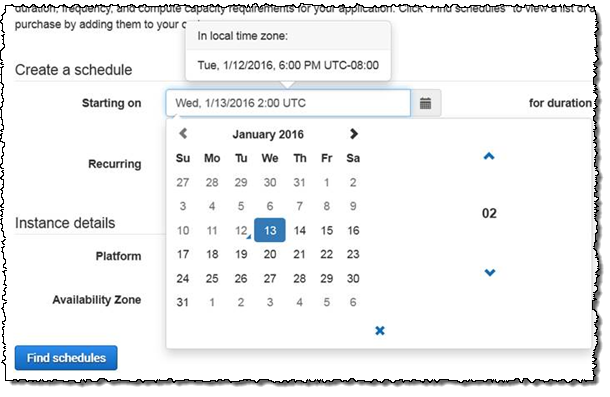
I can see the local starting time while I am setting up the schedule:
When I click on Find schedules, I can see what’s available at my desired time:
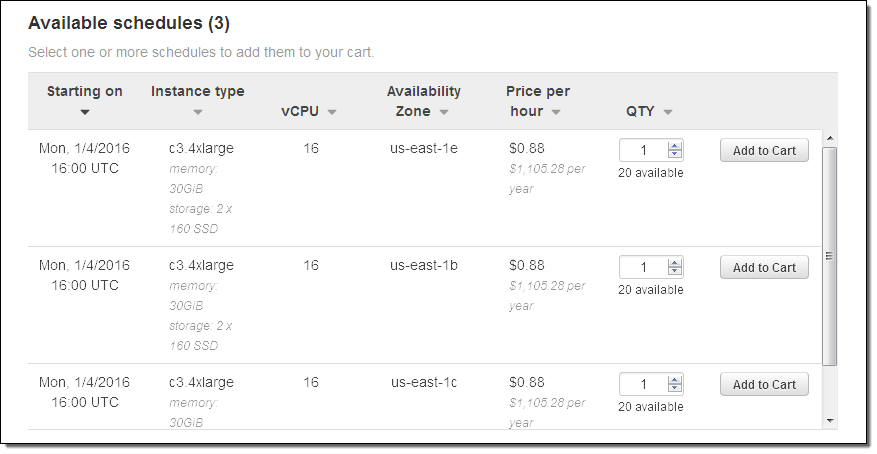
As you can see, the results include instances in several different Availability Zones because I chose Any in the previous step. Leaving the Availability Zone and/or the instance type unspecified will give me more options.
I can add the desired instance(s) to my cart, adjusting the quantity if necessary. I can see my choices in my cart:

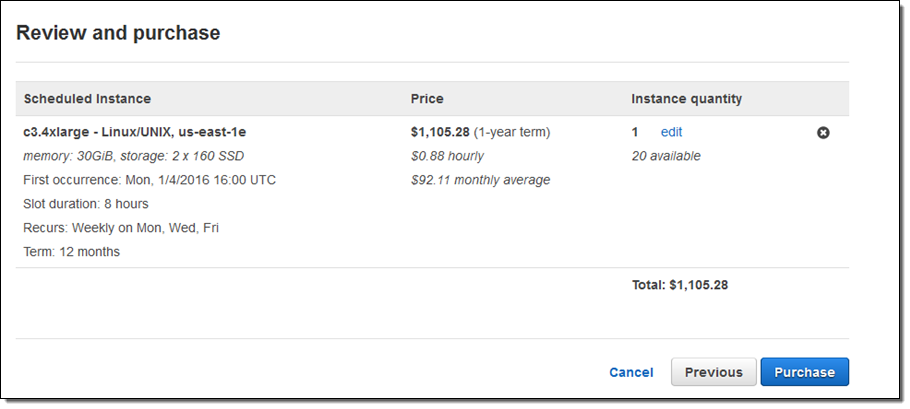
Once I have what I need I click on Review and purchase to proceed, verify my intent, and click on Purchase:
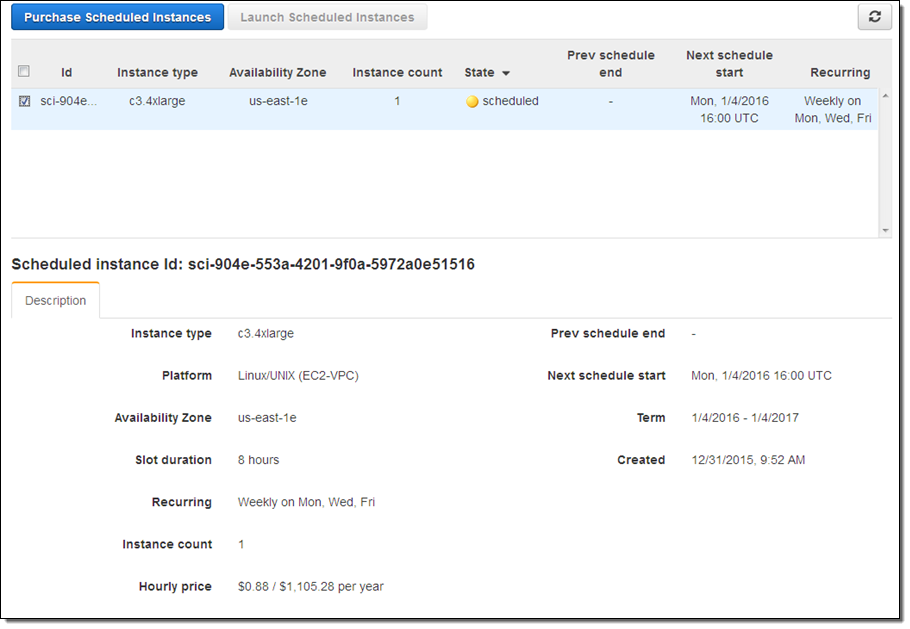
I can then see all of my Scheduled Reserved instances in the console:
Launching Scheduled Instances
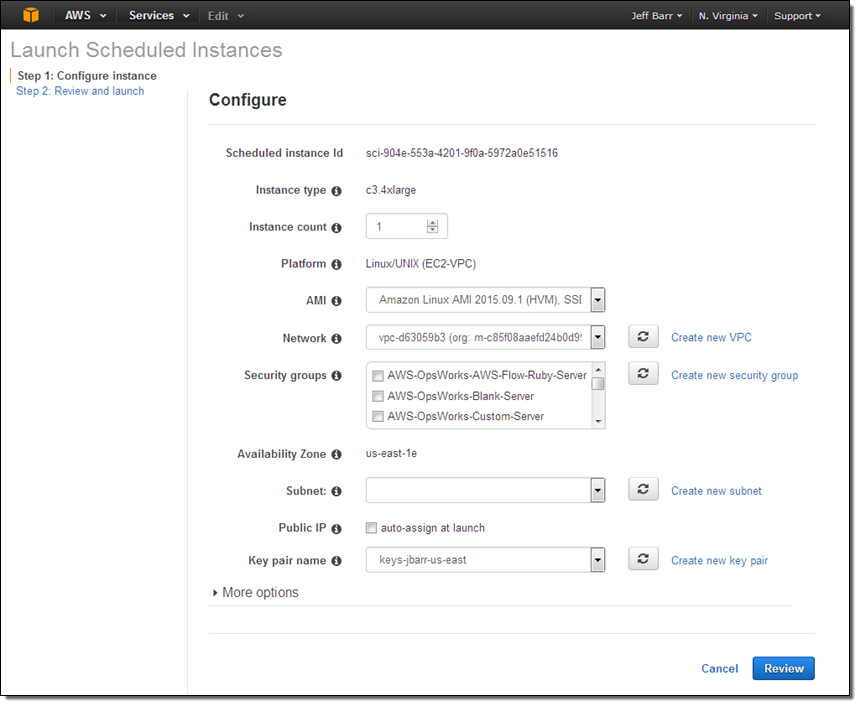
Each Scheduled Reserved instance becomes active according to the schedule that you chose when you made the purchase. You can then launch the instance by selecting it in the Console and clicking on Launch Scheduled Instances:

Then I configure the launch as usual and click on Review:
Scheduled Reserved instances can also be launched via the AWS Command Line Interface (CLI), the AWS Tools for Windows PowerShell, and the new RunScheduledInstances function. We are also working on support for Auto Scaling, AWS Lambda, and AWS CloudFormation.
Things to Know
With this launch, we now have two types of Reserved Instances. The original Reserved Instance (now called Standard Reserved Instances) model allows you to reserved EC2 compute capacity for a one or three year term and use them at any time. The new Scheduled Reserved Instance model allows you to reserve instances for predefined blocks of time on a recurring basis for a one-year term, with prices that are generally 5 to 10% lower than the equivalent On-Demand rates.
This feature is available today in the US East (Northern Virginia), US West (Oregon), and Europe (Ireland) regions, with support for the C3, C4, M4, and R3 instance types.
— Jeff;


No comments:
Post a Comment